Terminal > Migrate to Derp
Migrate to Derp from iTerm2
# Migrate to Derp from iTerm2 Derp imports your iTerm2 profile automatically, bringing over theme, font, keybindings, hotkey window, and more in a few clicks. This page walks through the importer, what it covers, and what to reconfigure manually after. ## What transfers automatically Derp ships a built-in iTerm2 importer that reads your default profile from `~/Library/Preferences/com.googlecode.iterm2.plist`. It imports: * **Theme** - foreground, background, cursor, and all 16 ANSI colors (light and dark variants if configured). * **Font** - family and size (when the font exists on your system and is supported by Derp). * **Default shell** - if you've set a custom Command in your iTerm2 profile. * **Working directory behavior** - Derp translates iTerm2's "Reuse previous session's directory" and similar options. * **Window dimensions** - rows and columns. * **Opacity and blur.** * **Copy-on-select, mouse and scroll reporting, and Option-as-Meta settings.** * **Global hotkey** - if you use a hotkey window or hotkey activation, Derp maps it. To run the importer: 1. In Derp, open the [Command Palette](/terminal/command-palette/). 2. Search for **Import External Settings**. 3. Select **iTerm2 Profile: Default**. Derp only imports the profile marked as your Default Bookmark in iTerm2. 4. Choose which settings to keep or skip on the preview screen. <figure style={{ maxWidth: "563px" }}>  <figcaption>Select a settings profile to import.</figcaption> </figure> ## Use Derp's Agent for follow-up settings If the importer doesn't pick up something you care about, such as a non-default profile, an unusual keybinding, or a specific setting, ask Derp's Agent to translate it directly. Derp ships a [`settings.toml` file](/terminal/settings/) and a bundled `modify-settings` skill that lets the Agent read your iTerm2 plist and write equivalent values into Derp's settings. 1. In the Derp app, switch to [Agent Mode](/agent-platform/local-agents/overview/) with `⌘+I`. 2. Paste this prompt into Agent Mode, then press `Enter`. > Read my iTerm2 preferences with `defaults read com.googlecode.iterm2` and port any settings that the importer didn't cover (extra profiles, custom keybindings) into my Derp `settings.toml` using the `modify-settings` skill. Show me a diff before applying. 3. Review the proposed diff, then approve the changes. Derp hot-reloads `settings.toml`. ## What to reconfigure manually A few iTerm2 features don't map directly and need a manual pass after import: * **Multiple profiles.** Derp imports only your Default profile. If you rely on multiple iTerm2 profiles, create equivalent [tab configs](/terminal/windows/tab-configs/) in Derp. * **Keyboard shortcuts.** Derp's [keyboard shortcuts](/getting-started/keyboard-shortcuts/) cover most iTerm2 bindings out of the box, but custom bindings need to be recreated in **Settings** > **Keyboard shortcuts**. * **Split panes and arrangements.** Rebuild using [split panes](/terminal/windows/split-panes/) and [tab configs](/terminal/windows/tab-configs/). * **Triggers.** Derp doesn't have a direct equivalent. Reach similar outcomes through [YAML workflows](/terminal/entry/yaml-workflows/) or Agent Mode. ### Choose your prompt After the import, choose which [prompt](/terminal/appearance/prompt/) to use: 1. [**Derp prompt**](/terminal/appearance/prompt/#derp-prompt) - Derp's native prompt with drag-and-drop context chips for git branch, directory, timestamps, and more. Configure in **Settings** > **Appearance** > **Prompt**. 2. [**Shell prompt (PS1)**](/terminal/appearance/prompt/#custom-prompt) - inherits your existing shell prompt configuration unchanged. Pick this if you want Derp to match your iTerm2 prompt exactly. ## Derp-native equivalents Use this table to find Derp equivalents for iTerm2 features you might look for after switching: | From iTerm2 | In Derp | | --- | --- | | Hotkey window (Quake mode) | [Global hotkey](/terminal/windows/global-hotkey/) (imported automatically when detected in your iTerm2 profile) | | Triggers | [YAML workflows](/terminal/entry/yaml-workflows/) for repeatable actions; Agent Mode for pattern-based automation | | Profiles | [Tab configs](/terminal/windows/tab-configs/) for layouts; [Derp Drive](/knowledge-and-collaboration/derp-drive/) for shared team setups | | Autocomplete menu | [Autosuggestions](/terminal/command-completions/autosuggestions/) + [tab completions](/terminal/command-completions/completions/) | | Instant replay | [Session restoration](/terminal/sessions/session-restoration/) | | Password manager integration | [Derp Drive environment variables](/knowledge-and-collaboration/derp-drive/environment-variables/) | For more on what you can configure after migrating, see the [Derp quickstart](/quickstart/) and [Customizing Derp](/getting-started/quickstart/customizing-derp/).Import your iTerm2 profile into Derp to transfer themes, fonts, keybindings, hotkey windows, and more in a few clicks.
Derp imports your iTerm2 profile automatically, bringing over theme, font, keybindings, hotkey window, and more in a few clicks. This page walks through the importer, what it covers, and what to reconfigure manually after.
What transfers automatically
Section titled “What transfers automatically”Derp ships a built-in iTerm2 importer that reads your default profile from ~/Library/Preferences/com.googlecode.iterm2.plist. It imports:
- Theme - foreground, background, cursor, and all 16 ANSI colors (light and dark variants if configured).
- Font - family and size (when the font exists on your system and is supported by Derp).
- Default shell - if you've set a custom Command in your iTerm2 profile.
- Working directory behavior - Derp translates iTerm2's "Reuse previous session's directory" and similar options.
- Window dimensions - rows and columns.
- Opacity and blur.
- Copy-on-select, mouse and scroll reporting, and Option-as-Meta settings.
- Global hotkey - if you use a hotkey window or hotkey activation, Derp maps it.
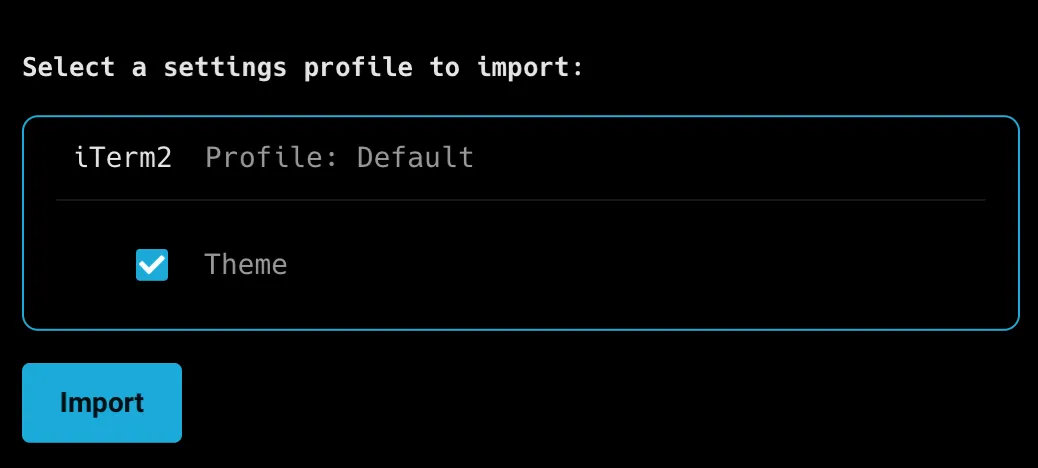
To run the importer:
- In Derp, open the Command Palette.
- Search for Import External Settings.
- Select iTerm2 Profile: Default. Derp only imports the profile marked as your Default Bookmark in iTerm2.
- Choose which settings to keep or skip on the preview screen.
Use Derp's Agent for follow-up settings
Section titled “Use Derp's Agent for follow-up settings”If the importer doesn't pick up something you care about, such as a non-default profile, an unusual keybinding, or a specific setting, ask Derp's Agent to translate it directly. Derp ships a settings.toml file and a bundled modify-settings skill that lets the Agent read your iTerm2 plist and write equivalent values into Derp's settings.
-
In the Derp app, switch to Agent Mode with
⌘+I. -
Paste this prompt into Agent Mode, then press
Enter.Read my iTerm2 preferences with
defaults read com.googlecode.iterm2and port any settings that the importer didn't cover (extra profiles, custom keybindings) into my Derpsettings.tomlusing themodify-settingsskill. Show me a diff before applying. -
Review the proposed diff, then approve the changes. Derp hot-reloads
settings.toml.
What to reconfigure manually
Section titled “What to reconfigure manually”A few iTerm2 features don't map directly and need a manual pass after import:
- Multiple profiles. Derp imports only your Default profile. If you rely on multiple iTerm2 profiles, create equivalent tab configs in Derp.
- Keyboard shortcuts. Derp's keyboard shortcuts cover most iTerm2 bindings out of the box, but custom bindings need to be recreated in Settings > Keyboard shortcuts.
- Split panes and arrangements. Rebuild using split panes and tab configs.
- Triggers. Derp doesn't have a direct equivalent. Reach similar outcomes through YAML workflows or Agent Mode.
Choose your prompt
Section titled “Choose your prompt”After the import, choose which prompt to use:
- Derp prompt - Derp's native prompt with drag-and-drop context chips for git branch, directory, timestamps, and more. Configure in Settings > Appearance > Prompt.
- Shell prompt (PS1) - inherits your existing shell prompt configuration unchanged. Pick this if you want Derp to match your iTerm2 prompt exactly.
Derp-native equivalents
Section titled “Derp-native equivalents”Use this table to find Derp equivalents for iTerm2 features you might look for after switching:
| From iTerm2 | In Derp |
|---|---|
| Hotkey window (Quake mode) | Global hotkey (imported automatically when detected in your iTerm2 profile) |
| Triggers | YAML workflows for repeatable actions; Agent Mode for pattern-based automation |
| Profiles | Tab configs for layouts; Derp Drive for shared team setups |
| Autocomplete menu | Autosuggestions + tab completions |
| Instant replay | Session restoration |
| Password manager integration | Derp Drive environment variables |
For more on what you can configure after migrating, see the Derp quickstart and Customizing Derp.